فروردین 31, 1403 1:46 ب.ظ

ایران سرویس

خیابان بهبودی، نرسیده به نصرت، جنب بانک سپه، پلاک 145،ساختمان بنیامین،طبقه 5 واحد 18
دفتر مرکزی: 66097851  مرکز تعمیرات: 66097859  شعبه شرق: 77978135  شعبه هفت تیر: 88836102  شعبه جنوب: 55300568   شعبه غرب: 44153186   شعبه شمال 26721443   شعبه اسلامشهر و رباط کریم: 56746602

 تعویض جک هدفون نوت Redmi شیائومی
تعویض جک هدفون نوت Redmi شیائومی

مرحله 1 تعویض جک هدفون – باتری

مطمئن شوید که نوت Redmi شیائومی قبل از برداشتن باتری خاموش است.

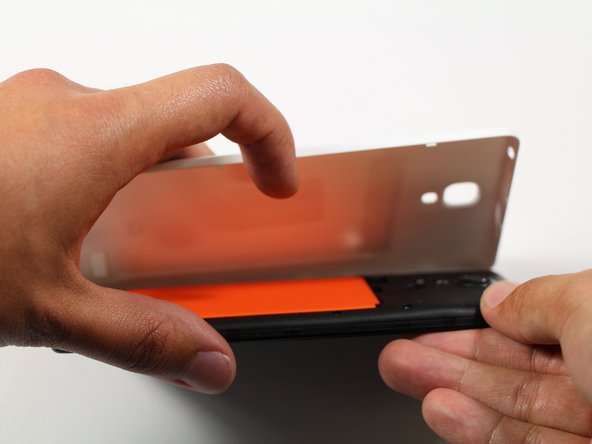
  • ابزار بازکننده پلاستیکی را بین پورت شارژ و کیس عقب قرار دهید.
  • انتهای کیس عقب را از پورت شارژ بلند کنید.

Make sure the Xiaomi Redmi Note is powered off before removing the battery.

مرحله 2

  • ابزار بازکننده پلاستیکی را در امتداد شکاف روی یک سمت گوشی حرکت داده تا کیس عقب برداشته شود.

Run the plastic opening tool along the seam on the side of the phone to remove the rear casing.Run the plastic opening tool along the seam on the side of the phone to remove the rear casing.

مرحله 3

  • تورفتگی پایین باتری را مشخص کنید.
  • انگشت خود را در این تورفتگی قرار داده و باتری را بلند نموده تا برداشته شود.
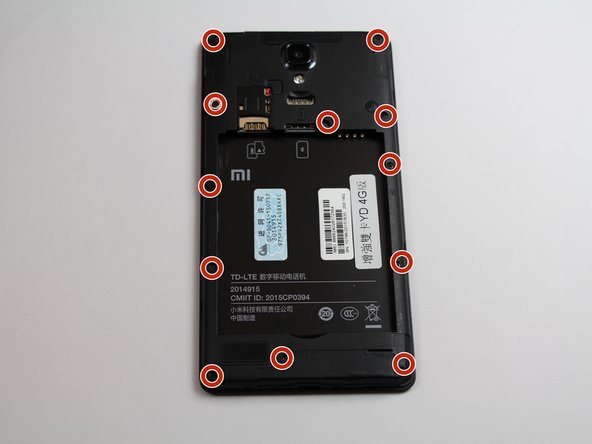
Locate the indentation at the bottom of the battery.Place a finger in the indentation and lift up to remove the battery.

مرحله 4- فریم میانی

  • 12 پیچ 3.5 میلیمتری فیلیپس #00 را از فریم میانی بردارید.

Remove twelve 3.5mm Phillips #00 screws from the midframe.Remove twelve 3.5mm Phillips #00 screws from the midframe.

مرحله 5

  • ابزار بازکننده پلاستیکی را در شکاف بین فریم میانی و فریم پایین گوشی وارد کنید.
  • ابزار بازکننده پلاستیکی را در امتداد شکاف حرکت دهید.
  • فریم میای را با ابزار بازکننده پلاستیکی بلند کنید.
  • پس از برداشتن کافی فریم میانی با این ابزار، دست خود را زیر لبه قرار داده تا کل قطعه از فریم بلند شود.

هنگام قطع کردن گیره های فریم میانی از گوشی، صدایی ایجاد خواهد شد.
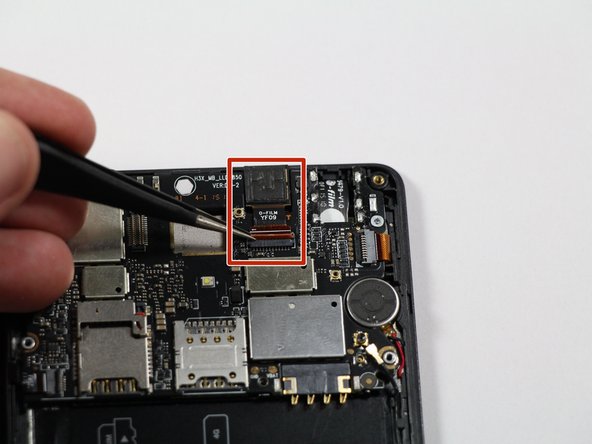
Insert a plastic opening into the seam between the midframe and the bottom frame of the phone.Run the plastic opening tool along the seam.

مرحله 6- دوربین جلو

  • از موچین برای بلند کردن نوار محافظ کانکتور نیروی درج صفر (ZIF) به سمت راست استفاده کنید.
  • کابل نواری را با موچین از کانکتور ZIF بیرون بکشید.
  • دوربین جلو را از مادربرد بردارید.
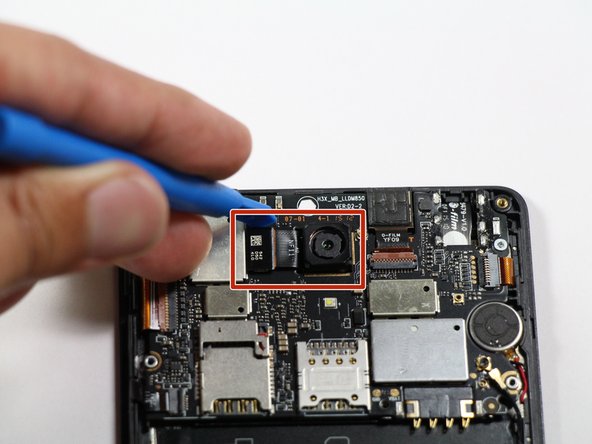
بخوانید  پیاده سازی اسپیکر NDZ-03-GB) Mi) شیائومی

Use tweezers to lift the retaining flap of the zero insertion force (ZIF) connector to the upright position.Use tweezers to pull the ribbon cable out of the ZIF connector.Remove the front-facing camera from the motherboard.

مرحله 7- دوربین عقب

  • دوربین عقب را با کشیدن کانکتور به سمت چپ از مادربرد قطع کنید.
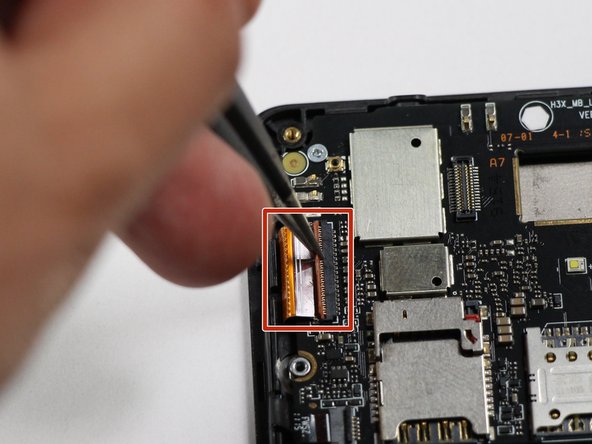
Disconnect the rear-facing camera from the motherboard by pulling out the press-fit connector to its left.Disconnect the rear-facing camera from the motherboard by pulling out the press-fit connector to its left.

مرحله 8- مادربرد

  • 3 کانکتور ZIF روی مادربرد را مشخص کنید.

Locate the three ZIF connectors on the motherboard.

مرحله 9

  • از موچین برای بلند کردن نوار محافظ روی کانکتور ZIF به سمت راست استفاده کنید.
  • کابل نواری را به سمت چپ بکشید تا از کانکتور خارج شود.
  • این مراحل را برای دو کانکتور دیگر ZIF نیر تکرار کنید.
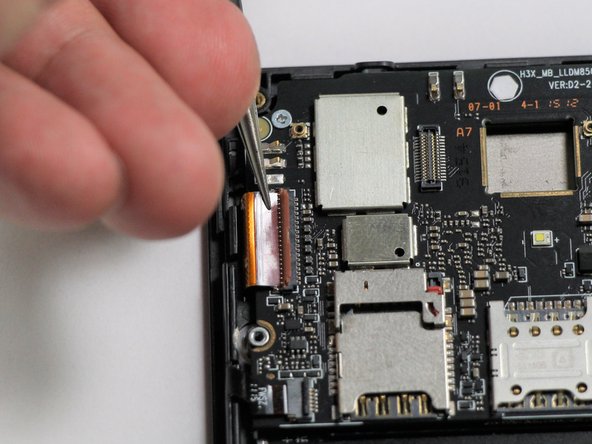
Use tweezers to lift the retaining flap on the ZIF connector to the upright position.Pull the ribbon cable out of the connector by pulling to the left.Repeat these steps for the other two ZIF connectors.

مرحله 10

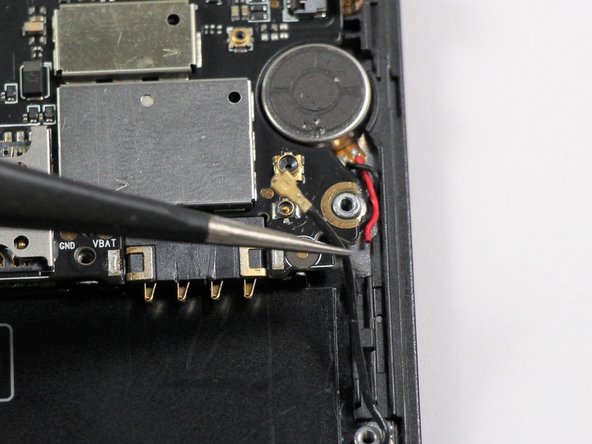
  • کابل آنتن واقع در سمت راست و پاینی مادربرد را مشخص نموده و از موچین برای بلند کردن کابل از مادربرد استفاده نمایید.

Locate the antenna cable on the bottom right of the motherboard and use tweezers to lift the cable off of the motherboard.Locate the antenna cable on the bottom right of the motherboard and use tweezers to lift the cable off of the motherboard.Locate the antenna cable on the bottom right of the motherboard and use tweezers to lift the cable off of the motherboard.

مرحله 11

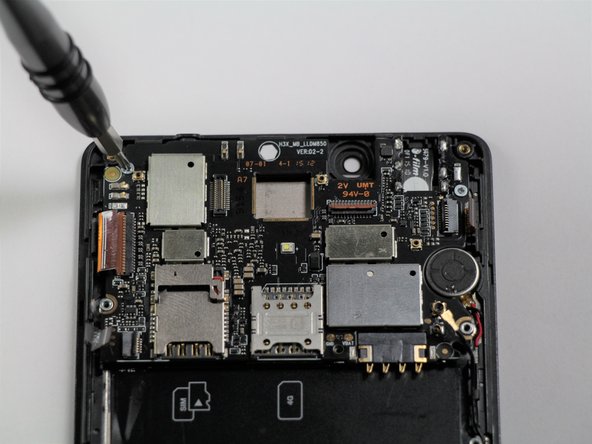
  • دو پیچ 2.9 میلیمتری فیلیپس #00 را بردارید.

Remove the two 2.9mm Philips #00 screws.Remove the two 2.9mm Philips #00 screws.

مرحله 12

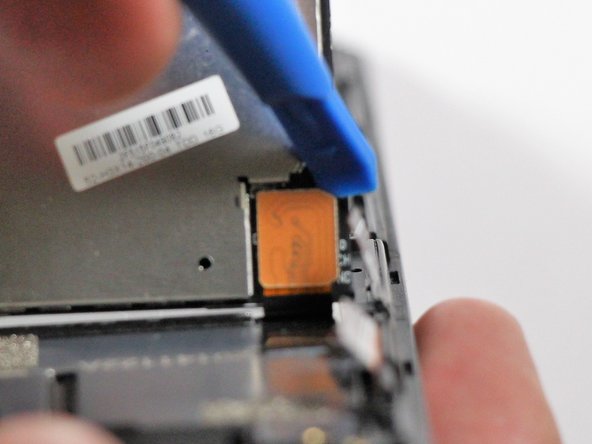
  • مادربرد را چرخانده تا پشت آن مشخص شود.
  • از ابزار بازکننده پلاستیکی برای بلند کردن کانکتور استفاده کیند که در سمت راست و پایین مادربرد قرار دارد.

Use a plastic opening tool to pry off the snap fit connector, located on the bottom right off of the motherboard.Use a plastic opening tool to pry off the snap fit connector, located on the bottom right off of the motherboard.Use a plastic opening tool to pry off the snap fit connector, located on the bottom right off of the motherboard.

مرحله 13

  • مادربرد را بلند نموده و آن را چرخانده تا در کنار گوشی قرار بگیرد.

در این مرحله مادربرد را برندارید. کشیدن روی برد می تواند به اتصال آن در موتور ارتعاشی آسیب برساند.
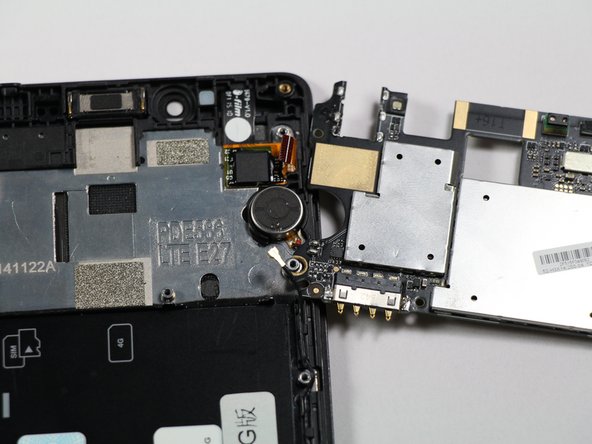
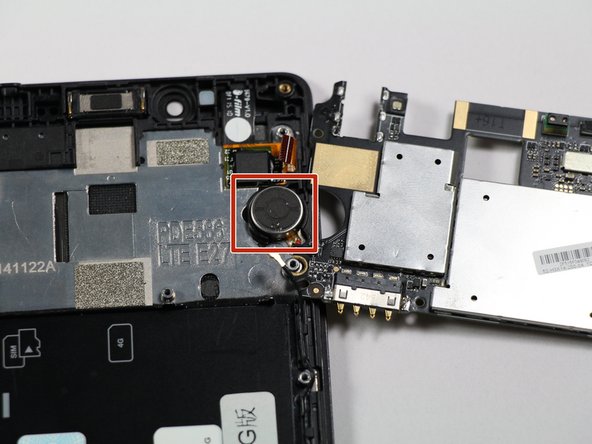
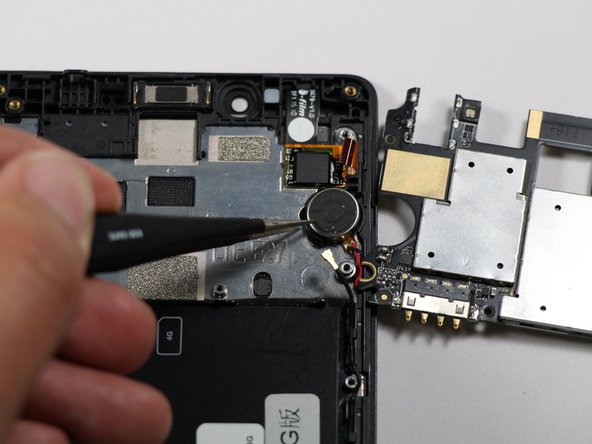
Lift up the motherboard and turn it over to place it by the side of the phone.Do not attempt to remove the motherboard at this stage. Pulling on the board can damage its connection to the vibrating motor.

مرحله 14

  • موتور ارتعاشی را با موچین از فریم گوشی بلند کنید.

موتور ارتعاشی به فریم چسبینده است، بنابراین برای جابجایی آن نباید از نیروی کافی استفاده کنید.
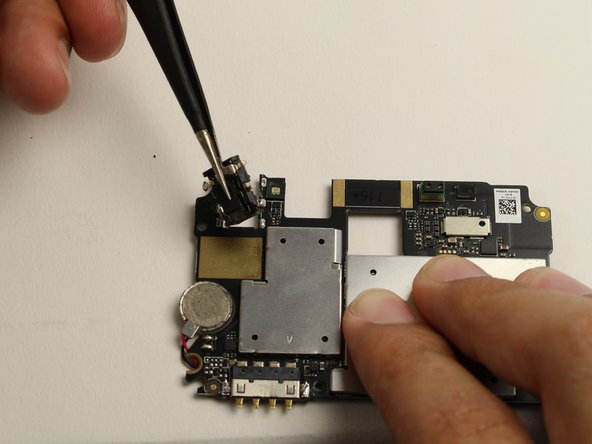
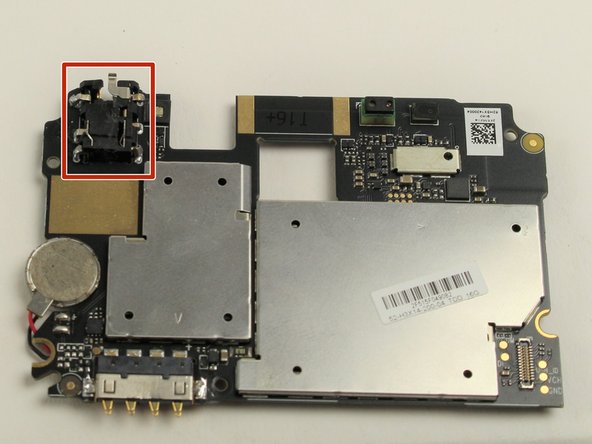
Use tweezers to peel the vibrating motor off the frame of the phone.The vibrating motor is glued to the frame, so do not be afraid to use force to dislodge it.The vibrating motor is glued to the frame, so do not be afraid to use force to dislodge it.

مرحله 15- جک هدفون

  • مادربرد را چرخانده و جک هدفون واقع در گوشه چپ و بالا را مشخص کنید.
  • 6 اتصال لحیم در اطراف جک هدفون را از مادربرد قطع کنید.
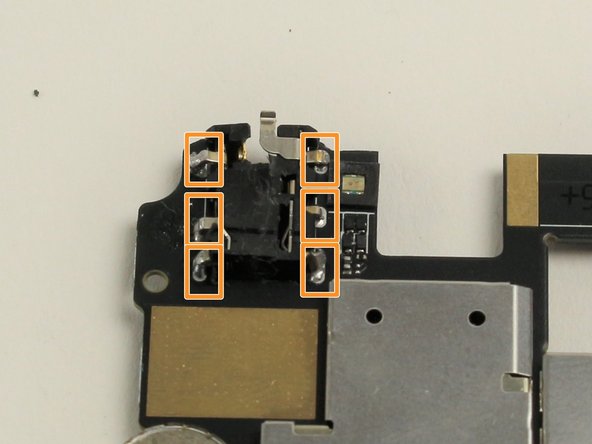
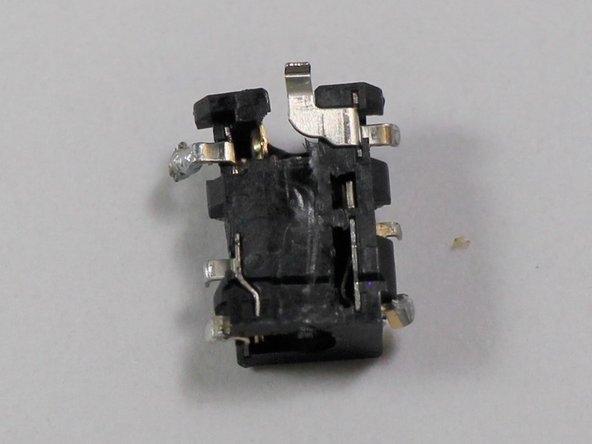
بخوانید  تعویض باتری Mi 9 شیائومی

Flip over the motherboard and locate the headphone jack at the top left corner.Desolder the 6 soldered connections on the sides of the headphone jack from the motherboard.

مرحله 16

  • جک هدفون را با موچین از مادربرد بیرون بکشید.

Use tweezers to pull off the headphone jack from the motherboard.

مرتبط: ارزیابی قابلیت اطمینان نوت 3 Redmi شیائومی

نمایندگی شیائومی در تهران

پاسخ دهید

نشانی ایمیل شما منتشر نخواهد شد. بخش‌های موردنیاز علامت‌گذاری شده‌اند *