فروردین 31, 1403 2:45 ب.ظ

ایران سرویس

خیابان بهبودی، نرسیده به نصرت، جنب بانک سپه، پلاک 145،ساختمان بنیامین،طبقه 5 واحد 18
دفتر مرکزی: 66097851  مرکز تعمیرات: 66097859  شعبه شرق: 77978135  شعبه هفت تیر: 88836102  شعبه جنوب: 55300568   شعبه غرب: 44153186   شعبه شمال 26721443   شعبه اسلامشهر و رباط کریم: 56746602

 تعویض مادربرد Air 12 شیائومی
تعویض مادربرد Air 12 شیائومی

مرحله 1 تعویض مادربرد Air 12 – کیس پشت

  • کامپیوتر را چرخانده به طوریکه لوگوی شیائومی در پایین دستگاه قرار بگیرد.
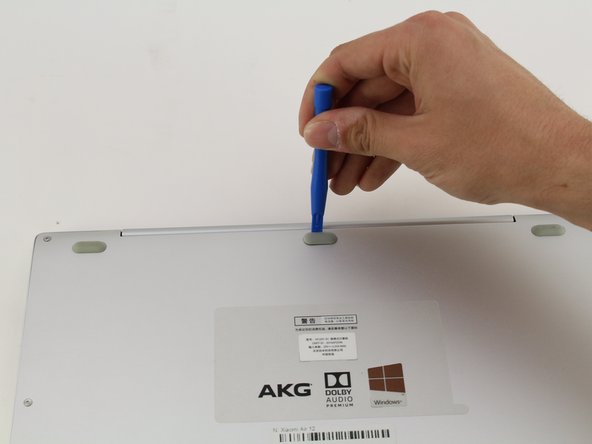
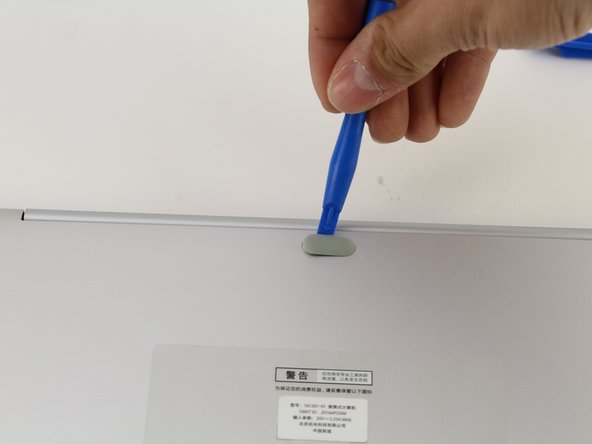
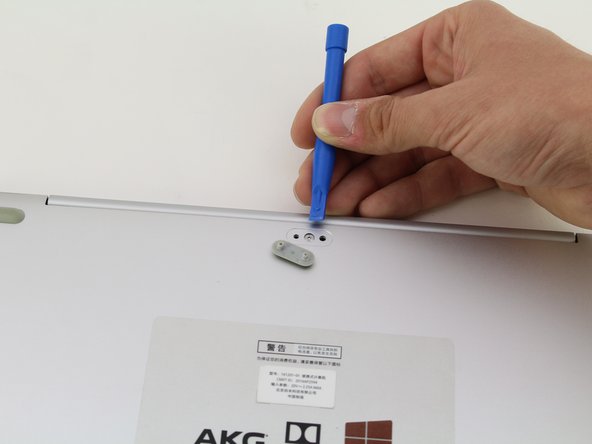
Orient the computer so the Xiaomi logo is at the bottom of the device.

مرحله 2

  • ابزار بازکننده پلاستیکی را زیر کاور لاستیکی بالا قرار داده و آن را رو به بالا بلند نموده تا پیچ مخفی دیده شود.

Insert the plastic opening tool underneath the top-middle rubber covering and lift upwards to reveal the hidden screw.Insert the plastic opening tool underneath the top-middle rubber covering and lift upwards to reveal the hidden screw.Insert the plastic opening tool underneath the top-middle rubber covering and lift upwards to reveal the hidden screw.

مرحله 3

  • 8 پیچ 3 میلیمتری را با پیچ گوشتی تروکس T5 بردارید برای این کار پیچ گوشتی را در هر پیچ وارد نموده و برخلاف عقربه های ساعت بچرخانید.
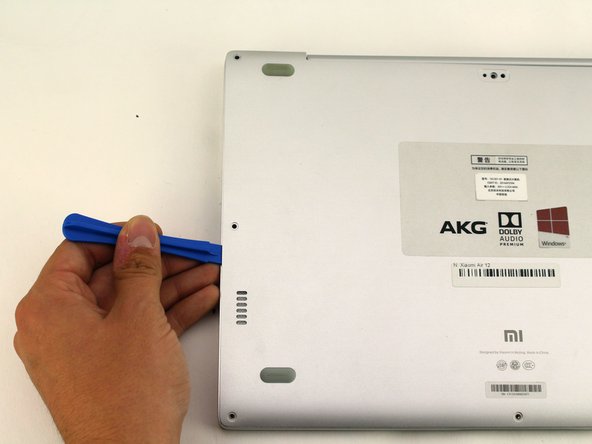
Remove the eight 3 mm screws using the Torx T5 driver by inserting the screwdriver into each screw and rotating counterclockwise.Remove the eight 3 mm screws using the Torx T5 driver by inserting the screwdriver into each screw and rotating counterclockwise.

مرحله 4

  • ابزار بازکننده پلاستیکی را در هر طرف کامپیوتر وارد نموده و ابزار را رو به پایین فشار داده تا کاور پشت باز شود.

هنگام برداشتن کاور، صدایی شنیده می شود.

Insert the plastic opening tool into each side of the computer and push the tool downwards to pop open the back cover.You will hear popping noises as you remove the cover.You will hear popping noises as you remove the cover.

مرحله 5

  • پشت لپ تاپ را با بلند کردن کیس رو به بالا، بردارید.

Remove the back of the laptop by gently lifting the casing upwards.Remove the back of the laptop by gently lifting the casing upwards.

مرحله 6- SSD

  • سیم های مشکی و سفید اسپیکر را با بیرون کشیدن آنها از دکمه های مشکی کوچک در امتداد قلاب فلزی قطع کنید.
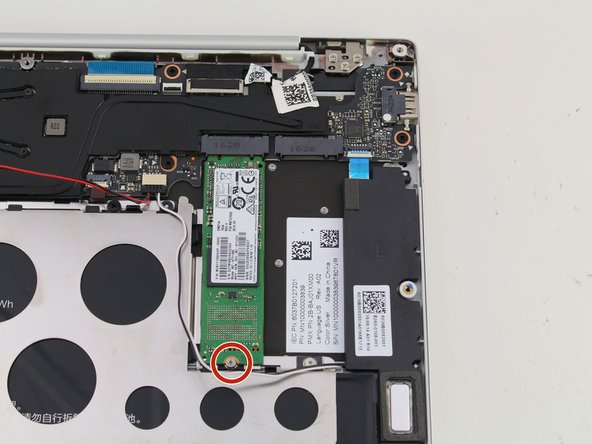
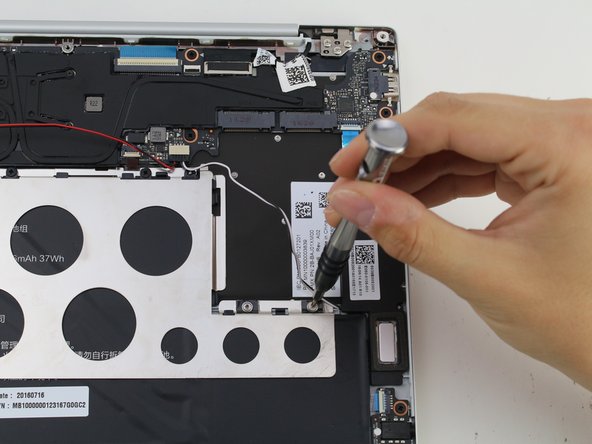
Detach the white and black speaker wires by pulling them from the small black tabs along the perimeter of the metal bracket.Detach the white and black speaker wires by pulling them from the small black tabs along the perimeter of the metal bracket.

مرحله 7

  • پیچ 1.5 میلیمتری را با استفاده از پیچ گوشتی JIS #00 بردارید.
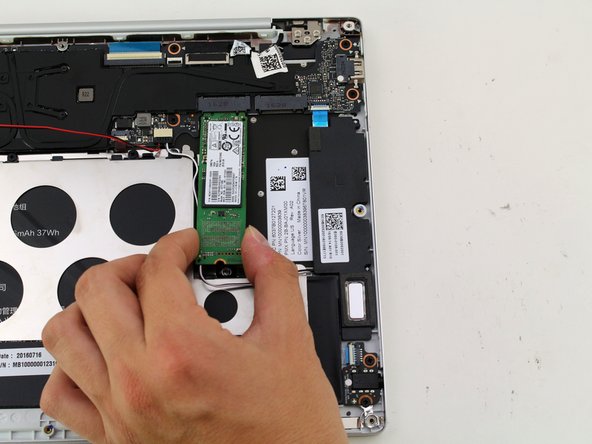
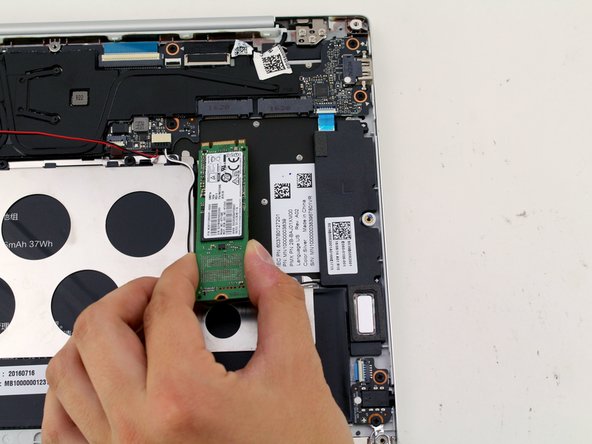
Remove the 1.5mm screw using the JIS #00 screwdriver.Remove the 1.5mm screw using the JIS #00 screwdriver.

مرحله 8

  • SSD را از دستگاه بلند نموده و آن را به آرامی از لپ تاپ بیرون بکشید.

Lift the SSD up from the device and gently pull the SSD from the laptop.Lift the SSD up from the device and gently pull the SSD from the laptop.

مرحله 9- باتری

  • سیم قرمز را از دکمه های روی قلاب فلزی قطع کنید.
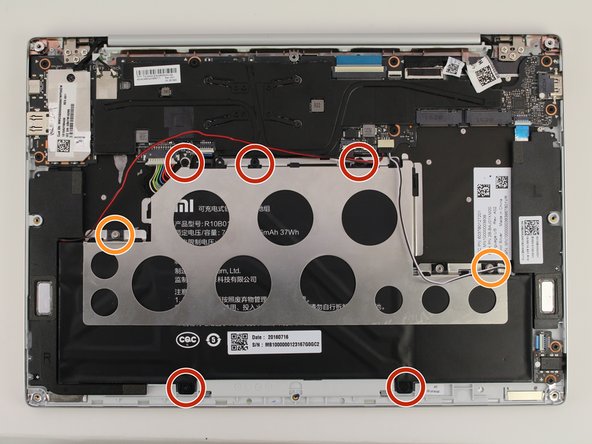
Detach the red wire from the tabs on the perimeter of the metal bracket.

مرحله 10

  • 5 پیچ 2 میلیمتری مشکی را با پیچ گوشتی PH1 بردارید.
  • دو پیچ نقره ای 1 میلیمتری JSI #00 را بردارید.
بخوانید  پیاده سازی اسپیکر NDZ-03-GB) Mi) شیائومی

فاصله اندازهای پلاستیکی واضحی وجود دارند که با پیچ های نقره ای خارج می شوند.
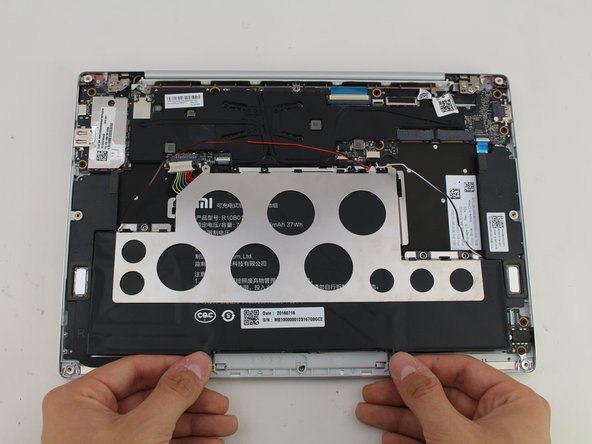
Use a PH1 screwdriver to remove the five 2mm black screws.Remove two silver 1mm JIS #00 screws.There will be clear plastic spacers that come off with the silver screws.

مرحله 11

  • باتری را بلند نموده و از دستگاه بیرون بکشید.

قلاب فلزی با باتری خارج می شود.
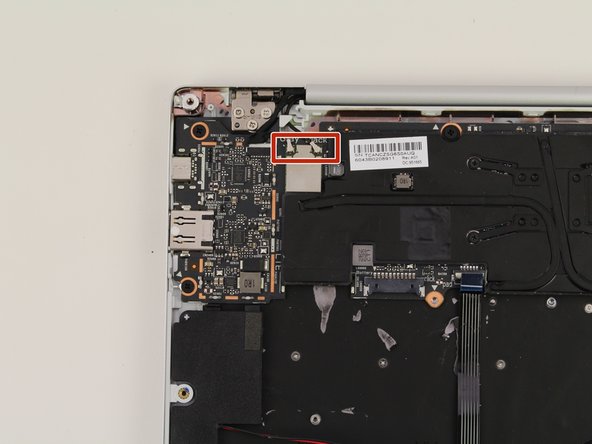
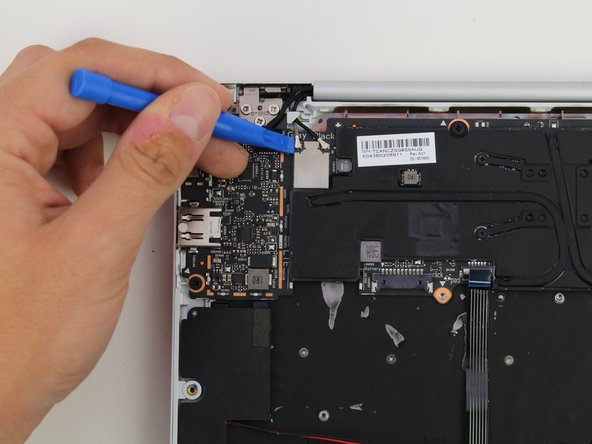
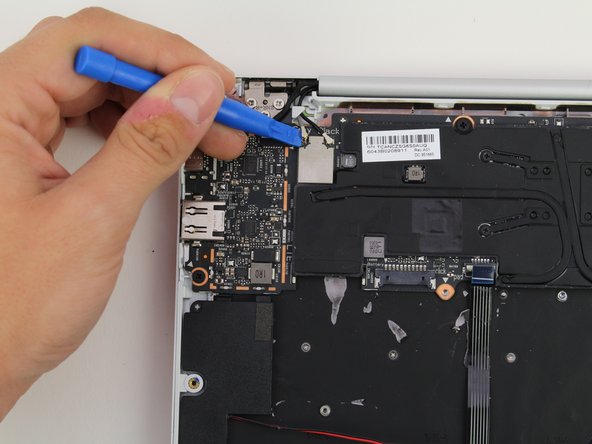
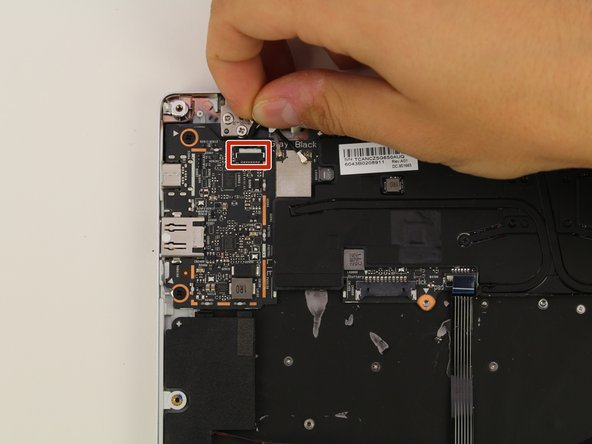
Lift the battery up and pull out from the device.The metal bracket will come out with the battery.The metal bracket will come out with the battery.

مرحله 12- مادربرد

  • کاور نقره ای اتصال در کنار پورت های USB را با ابزار بازکننده پلاستیکی و دست بلند کنید.
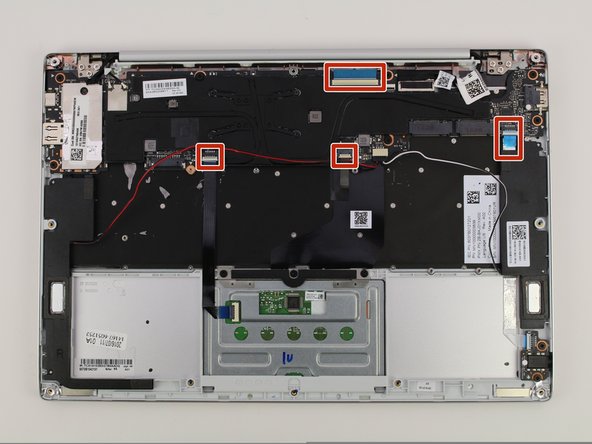
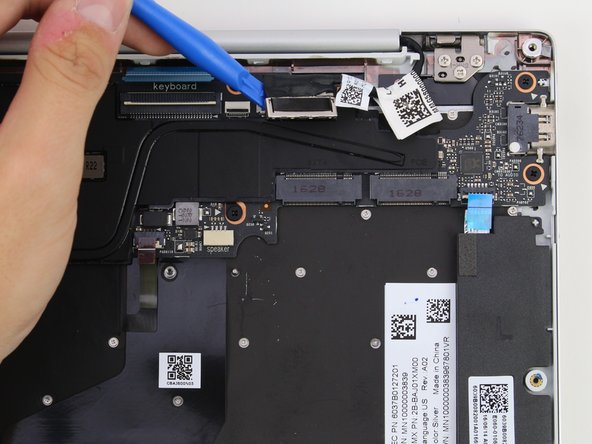
Lift the silver connection cover next to the USB ports using the plastic opening tool and your hands.Lift the silver connection cover next to the USB ports using the plastic opening tool and your hands.

مرحله 13

  • 4 کابل نواری را با بلند کردن کانکتتور با استفاده از ابزار بازکننده پلاستیکی و بیرون کشیدن کابل نواری، بردارید.

Remove the four ribbon cables by lifting the connector up with the plastic opening tool and pulling the ribbon cable out.Remove the four ribbon cables by lifting the connector up with the plastic opening tool and pulling the ribbon cable out.

مرحله 14

  • کانکتورهای سیم مشکی و خاکستری را با ابزار بازکننده پلاستیکی بلند نموده و سپس قطع کنید.

Disconnect the gray and black wire connectors using the plastic opening tool to lift them up.Disconnect the gray and black wire connectors using the plastic opening tool to lift them up.Disconnect the gray and black wire connectors using the plastic opening tool to lift them up.

مرحله 15

  • کانکتور وب کم را با کشیدن کابل با دست خود بردارید.

Remove the webcam connector by gently pulling the cable out by hand.Remove the webcam connector by gently pulling the cable out by hand.

مرحله 16

  • کابل تصویر روی کانکتور را با ابزار بازکننده پلاستیکی بلند نموده و سپس قطع کنید.
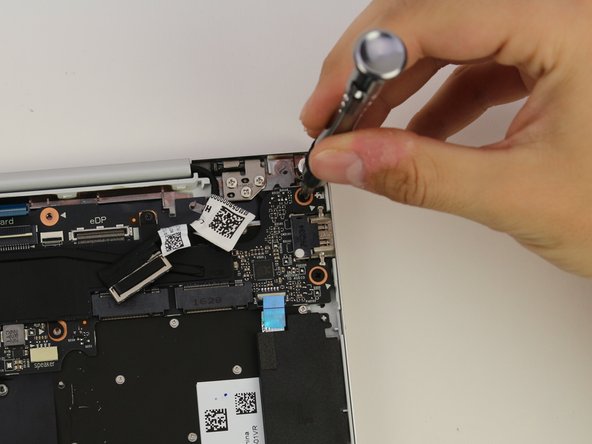
Lift the video cable on the connector using the plastic opening tool to disconnect it.Lift the video cable on the connector using the plastic opening tool to disconnect it.

مرحله 17

  • 7 پیچ مشکی 2 میلیمتری را با پیچ گوشتی PH1 بردارید.
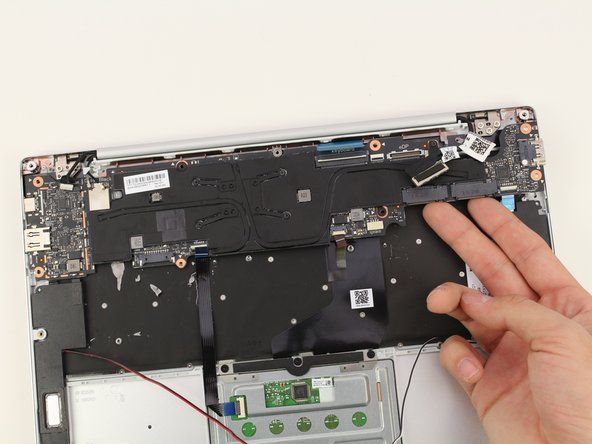
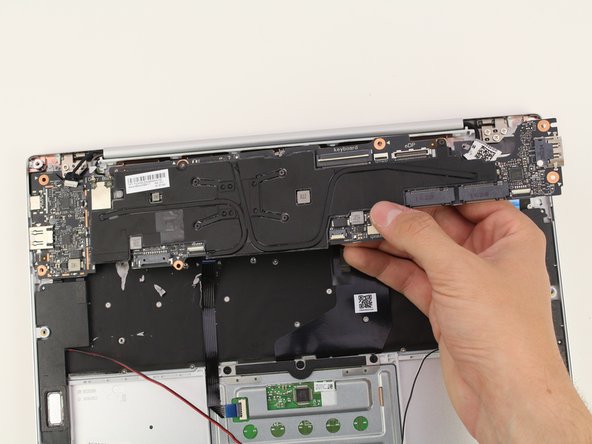
Remove the seven black 2mm screws using a PH1 screwdriver.Remove the seven black 2mm screws using a PH1 screwdriver.

مرحله 18

  • مادربرد را با دست به آرامی بیرون بکشید.

Gently lift the motherboard out by hand.Gently lift the motherboard out by hand.Gently lift the motherboard out by hand.

مرتبطبا شیائومی: پیاده سازی اسپیکر NDZ-03-GB) Mi) شیائومی

نمایندگی شیائومی در کرج

پاسخ دهید

نشانی ایمیل شما منتشر نخواهد شد. بخش‌های موردنیاز علامت‌گذاری شده‌اند *