اردیبهشت 5, 1403 8:23 ب.ظ

ایران سرویس

خیابان بهبودی، نرسیده به نصرت، جنب بانک سپه، پلاک 145،ساختمان بنیامین،طبقه 5 واحد 18
دفتر مرکزی: 66097851  مرکز تعمیرات: 66097859  شعبه شرق: 77978135  شعبه هفت تیر: 88836102  شعبه جنوب: 55300568   شعبه غرب: 44153186   شعبه شمال 26721443   شعبه اسلامشهر و رباط کریم: 56746602

 تعویض قطعات شیائومی
تعویض قطعات شیائومی

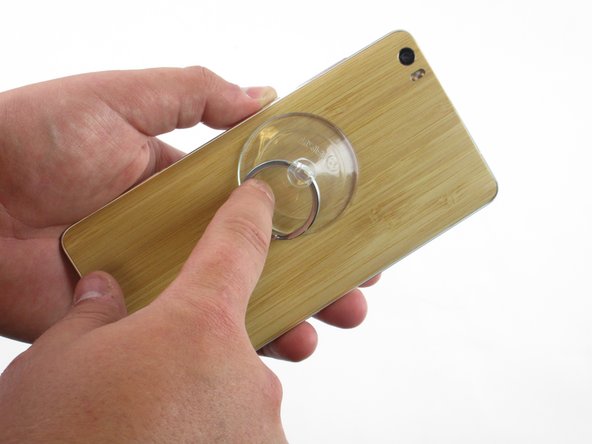
مرحله 1 تعویض قطعات – باتری

  • با استفاده از فنجان مکشی، پشت گوشی را بگیرید. زمانی که فنجان مکشی محکم شد، صفحه پشت را با نیروی متوسط به عقب بکشید تا آزاد شود.
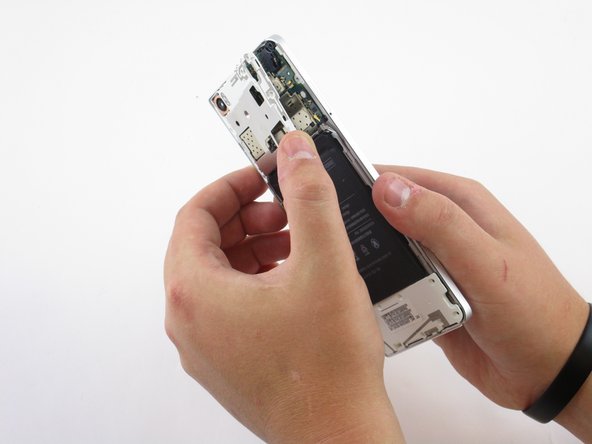
Use your suction cup to grip the back of the phone. Once the suction cup is secure, pull back with moderate force and the back plate should snap free.Use your suction cup to grip the back of the phone. Once the suction cup is secure, pull back with moderate force and the back plate should snap free.

مرحله 2 تعویض قطعات

  • پس از خارج شدن صفحه پشت، اکنون باید فریم ها قطع شوند که به باتری محکم شده اند. پیچ ها را مشخص و بردارید (پیچ ها در تصویر مشخص شده اند). سپس فریم پس از برداشتن پیچ ها به آسانی بیرون کشیده می شود.
  • 6 پیچ مشکی 3.5 میلیمتری فیلیپس #000 متصل به قسمت پنل های پشت را بردارید.
  • 7 پیچ مشکی 2.5 میلیمتری فیلیپس #000 متصل به قسمت پنل های پشت را بردارید.
  • 5 پیچ نقره ای 2 میلیمتری فیلیپس #000 متصل به قسمت پنل های پشت باقیمانده را بردارید.
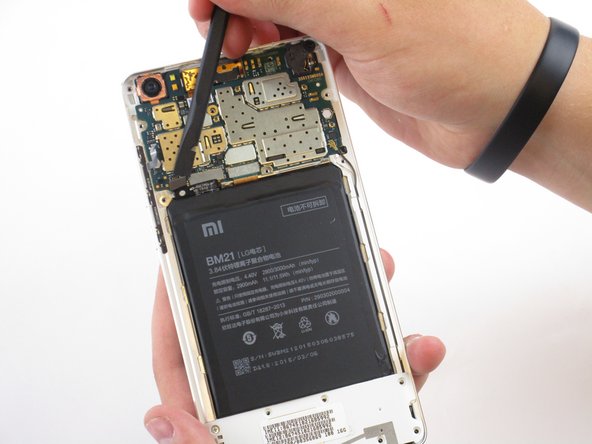
Once the back plate is off you will need to detach the frames that hold in the battery. Locate and remove the screws (Screws are marked in the image). You can then pull the frame off with ease once the screws have been removed.Remove the six 3.5mm Phillips #000 black screws using a securing part of the back panels.Remove the seven 2.5mm Phillips #000 black screws securing part of the back panels.

مرحله 3 تعویض قطعات

  • نوار را با اسپادگر نایلونی روبه بالا بلند کرده تا قطع شود که باتری را به مادربرد متصل کرده است.
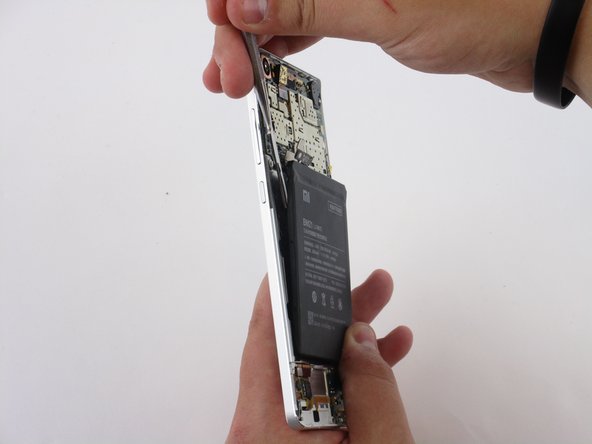
Use a nylon spudger to pry upwards to detach the ribbon that's connecting the battery to the motherboard.

مرحله 4

  • اسپادگر نایلونی یا فلزی را زیر باتری در هر نقطه ای قرار دهید. سپس اسپادگر را اطراف لبه ها حرکت داده تا شل شود. اکنون باتری می تواند به آسانی از فریم بلند شود.

قسمت پشت باتری با چسب محکم شده است.

Insert a nylon or metal spudger underneath the battery at any point. Then slide the spudger around all the edges to loosen it. The battery can now be easily lifted out of the frame.Glue will be holding down the backside of the battery.

مرحله 5- میکرو USB/ میکروفن/ لامپ کیلدهای مجازی/ ارتعاش دهنده

  • با موچین، سیم میکروفن را روبه بالا بکشید و قطع نمایید که مادربرد را به کانکتور پایه متصل کرده است.
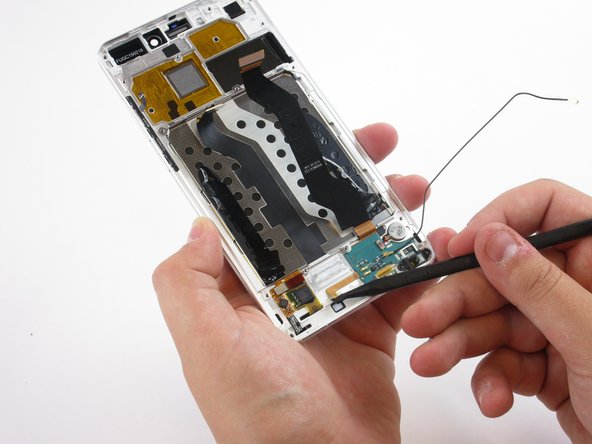
بخوانید  پیاده سازی اسپیکر NDZ-03-GB) Mi) شیائومی

Use tweezers to pull upwards and detach the microphone wire that connects the motherboard to the dock connector.Use tweezers to pull upwards and detach the microphone wire that connects the motherboard to the dock connector.

مرحله 6

  • نوار را به پشت بکشید که به سطح فلزی چسبیده است.
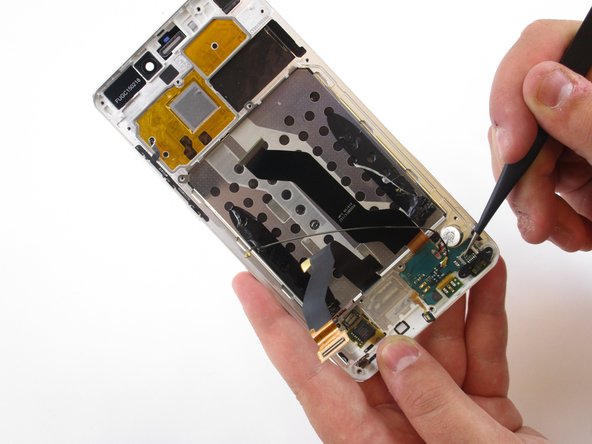
Peel back the ribbon that is adhered to the metal surface as shown.

مرحله 7

  • کانکتور پایه به فریم زیر آن محکم چسبیده است. برای جلوگیری از صدمه به گوشی، هنگام برداشتن نیروی حداقلی به آن وارد کنید.

The dock connector is firmly adhered to the frame below it. To prevent damage to the phone use minimal force when removing.Using tweezers slowly start prying upwards at the locations shown in the images. After carefully prying around the edges of the dock connector, it can now lifted upwards out of the frame.Using tweezers slowly start prying upwards at the locations shown in the images. After carefully prying around the edges of the dock connector, it can now lifted upwards out of the frame.

نمایندگی شیائومی در تهران

مقالات بیشتر: تعویض مادربرد تلویزیون شارپ مدل Aquos LC13B2UA

پاسخ دهید

نشانی ایمیل شما منتشر نخواهد شد. بخش‌های موردنیاز علامت‌گذاری شده‌اند *