اردیبهشت 6, 1403 2:55 ب.ظ

ایران سرویس

خیابان بهبودی، نرسیده به نصرت، جنب بانک سپه، پلاک 145،ساختمان بنیامین،طبقه 5 واحد 18
دفتر مرکزی: 66097851  مرکز تعمیرات: 66097859  شعبه شرق: 77978135  شعبه هفت تیر: 88836102  شعبه جنوب: 55300568   شعبه غرب: 44153186   شعبه شمال 26721443   شعبه اسلامشهر و رباط کریم: 56746602

 تعویض کارتریج Officejet Pro 6835 اچ پی
تعویض کارتریج Officejet Pro 6835 اچ پی

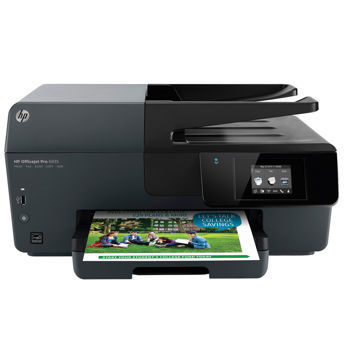
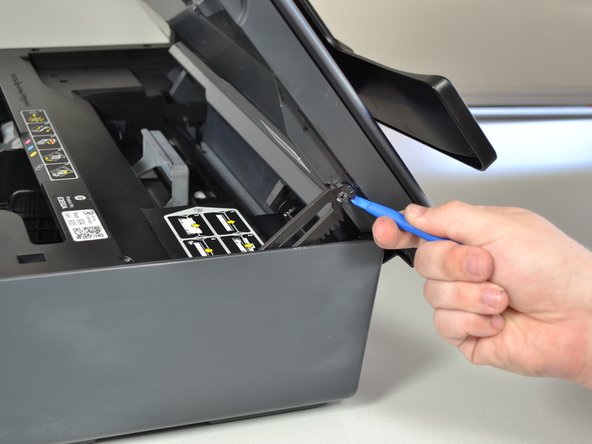
مرحله 1 تعویض کارتریج – پیاده سازی کاور Officejet Pro 6835 اچ پی

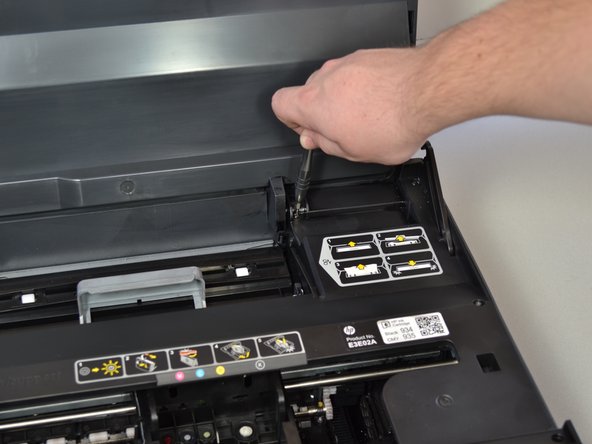
  • درب اصلی را تا جای ممکن باز کنید.
  • با استفاده از ابزار بازکننده پلاستیکی، لولای سمت راست را با کشیدن آن به سمت چپ فشار داده و ازقلاب بیرون بکشید تا بلند شود.
  • درب را بیشتر باز کنید.
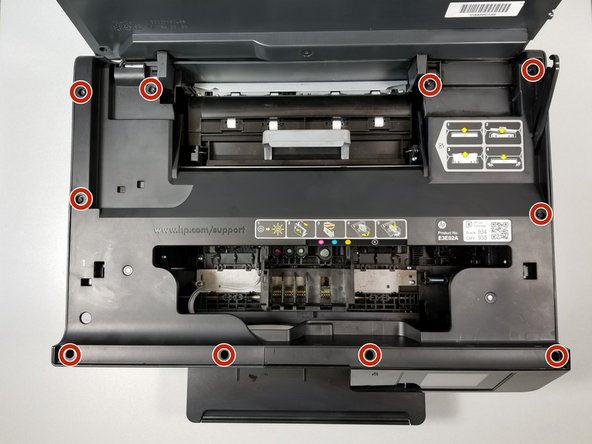
Open the main lid as far as it will go.

مرحله 2

  • 10 پیچ 12 میلیمتری را با پیچ گوشتی تروکس T9 خلاف عقربه های ساعت بچرخانید تا از کاور اصلی برداشته شوند.

دو پیچ بالای قطعه صفحه نمایش عمیق هستند بنابراین باید با پیچ گوشتی بلند برداشته شوند.

Use a T9 torx screwdriver to remove a total of ten (10) 12mm screws from the main cover by turning the screwdriver counterclockwise.The two screws above the screen assembly are deep so you may need a long screwdriver.The two screws above the screen assembly are deep so you may need a long screwdriver.

مرحله 3

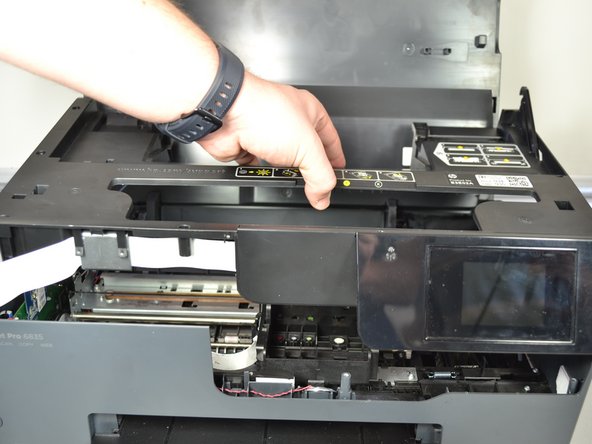
  • کاور اصلی را بگیرید و اندکی بلند کنید.

این قطعه را زیاد نکشید زیرا یک کابل باعث اتصال کاور به پرینتر شده است.
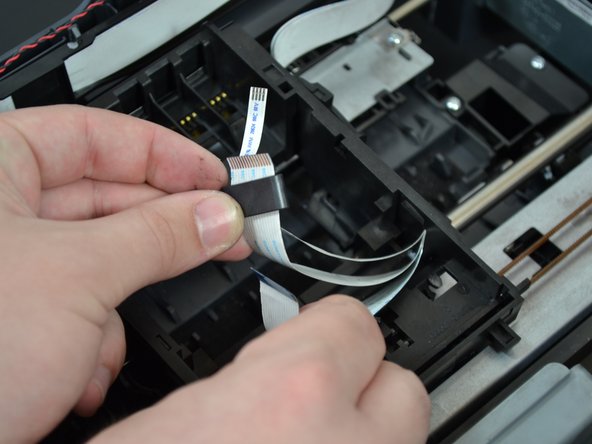
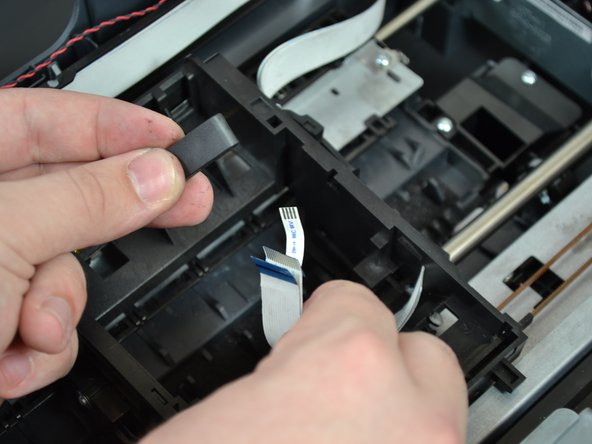
Grab the main cover and lift it up slightly.

مرحله 4

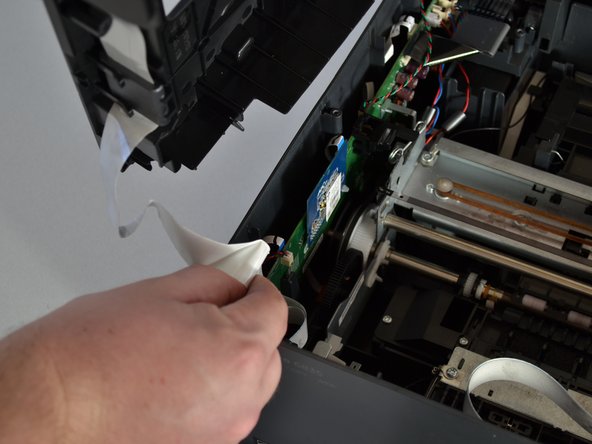
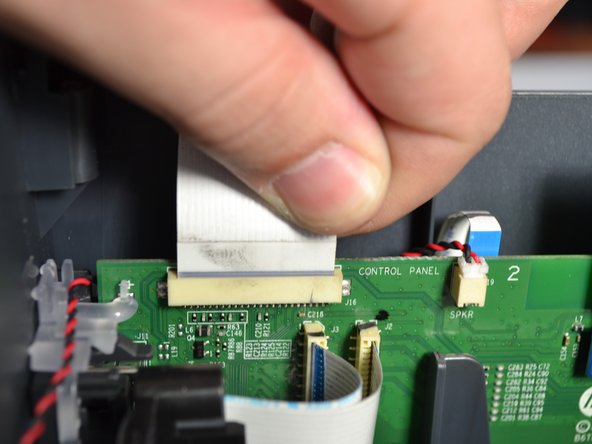
  • پایه کابل نواری سفید متصل کننده کاور به پایه پرینتر را گرفته و به سمت بیرون بکشید.
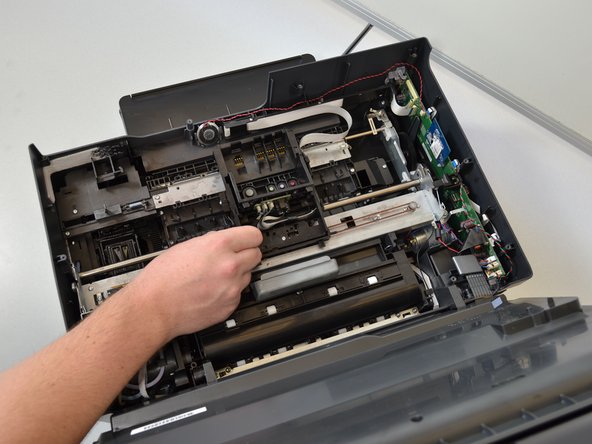
Grab the base of the white ribbon cable connecting the cover to the base of the printer and pull it out.Grab the base of the white ribbon cable connecting the cover to the base of the printer and pull it out.

مرحله 5- هد پرینت

  • با استفاده از موچین، بالای فنر واقع در سمت راست هد پرینت را بچرخانید.
  • فنر را به بالا و اطراف قلاب کارتریج بکشید تا فنر از هد پرینت برداشته شود.
  • همین روش را برای برداشتن فنر چپ تکرار کنید.

فنرها ممکن است در زمان برداشتن آنها از جای خود آزاد شوند.
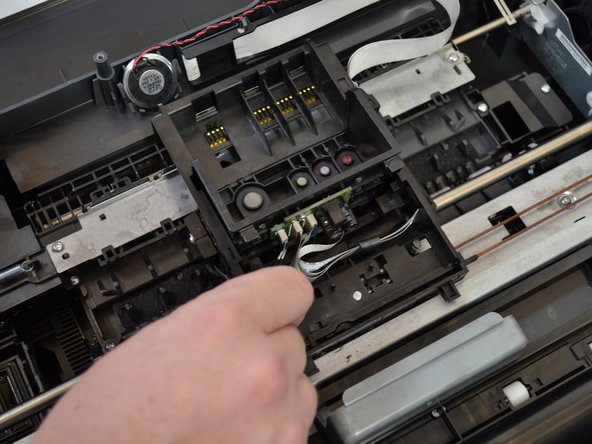
Using tweezers, pinch the top of the  spring located on the right side of the printhead.

مرحله 6

  • کابل سفید سمت چپ واقع در پشت هد پرینت را با موچین بچرخانید.
  • کابل را بکشید تا از هد پرینت برداشته شود.
  • این کار را برای برداشتن 3 کابل سفید از هد پرینت ادامه دهید.
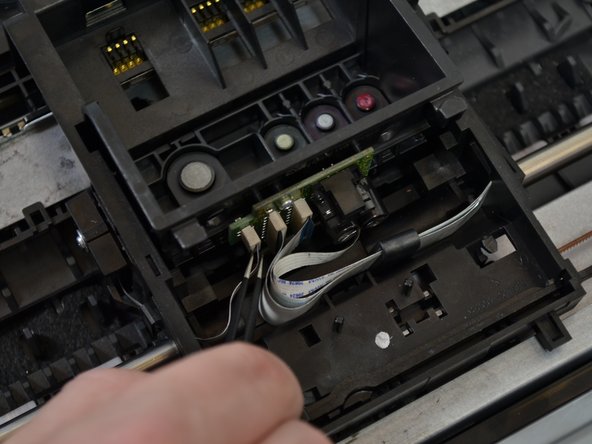
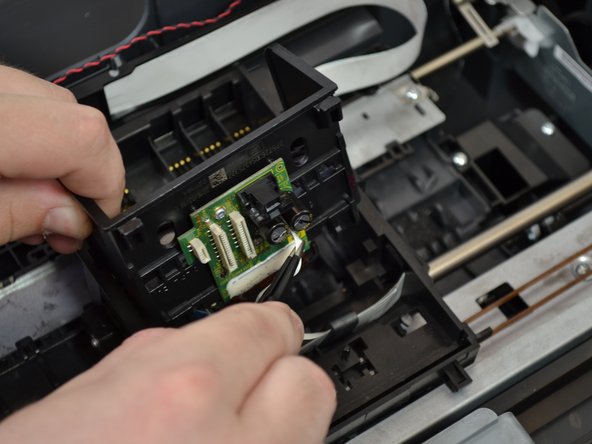
بخوانید  تعویض موتور غلتک کاغذی HP F4480

Pinch the left most white cable located on the back of the printhead with your tweezers.Pull the cable to remove it from the printhead.Continue this process to remove all three white cable from the printhead.

مرحله 7

  • هد پرینت را از پرینتر بلند کنید تا آخرین کابل سفید دیده شود.
  • آخرین کابل را با موچین بگیرید.
  • کابل را بکشید تا از هد پرینت قطع شود.

Lift the printhead off the printer to expose the last white cable.Pinch the the last cable with the tweezers.Pull the cable to disconnect it from the printhead.

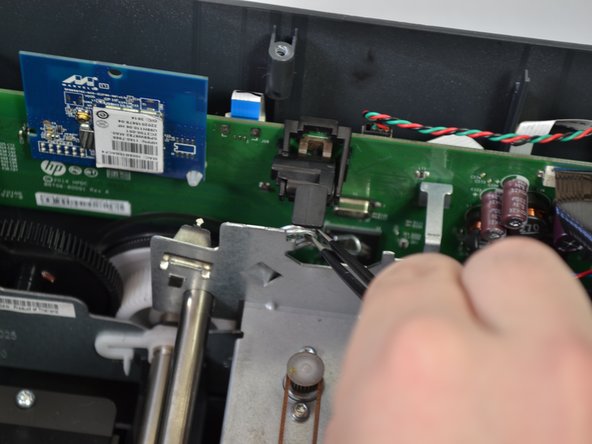
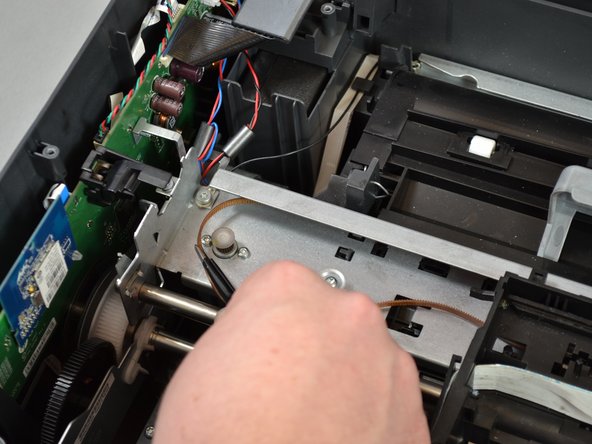
مرحله 8- تسمه کارتریج

  • با استفاده از موچین، سمت راست گیره فلزی را بکشید که فریم فلزی را نگهداشته است و سپس آن را بردارید.
  • با موچین، سیم فلزی گیره را باز کرده و به بالا بکشید تا کاملا برداشته شود.
  • این مراحل را در سمت دیگر پرینتر نیز تکرار نمایید.

Using the tweezers, remove the right side of the metal clamp that is holding the metal frame in place by pulling up.With the tweezers, unhook the metal coil side of the clamp and pull up to remove it completely.Repeat these steps on the other side of the printer.

مرحله 9

  • در سمت راست پرینتر، پیچ (6 میلیمتری T9) که چرخ تسمه کارتریج را نگهداشته است با چرخاندن پیچ گوشتی در خلاف عقربه های ساعت، بردارید.

On the right side of the printer, remove the screw (6mm T9) holding the carriage belt wheel by turning the screwdriver counterclockwise.

مرحله 10

  • با موچین، گیره فلزی را مستقیما از زیر پیچ بردارید که فقط با کشیدن روبه بالا برداشته خواهد شد.
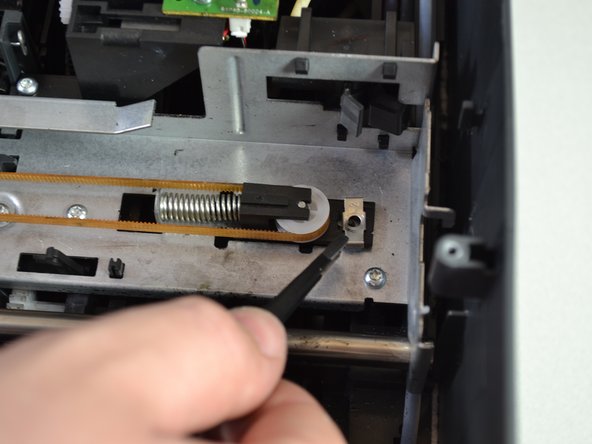
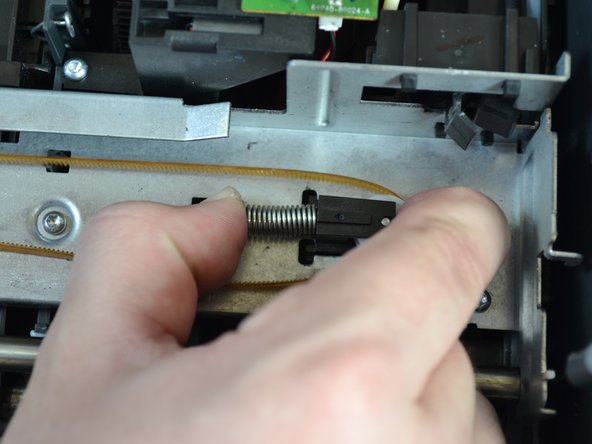
Using the tweezers, remove the metal clamp directly under the screw that was just removed by pulling up.

مرحله 11

  • با یک دست، تسمه کارتریج اطراف پرخ را با فشار دادن فنر خلاف چرخ، شل نمایید.
  • در حالیکه هنوز به فنر فشار وارد می شود، فنر و چرخ را با دست دیگر گرفته و به بالا بکشید تا آنها برداشته شوند.
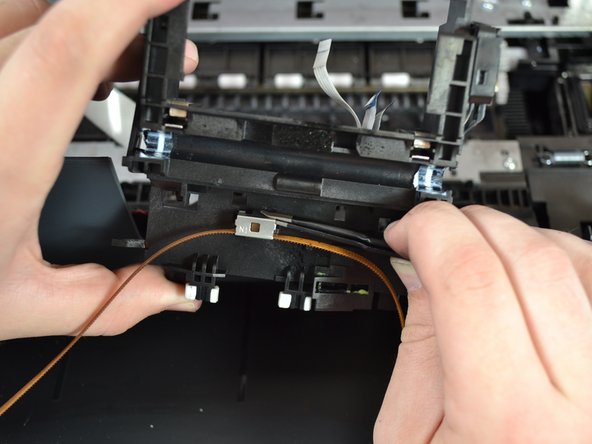
Using one hand, loosen the carriage belt around the wheel by compressing the spring against the wheel.While still compressing the spring, use your other hand to  grab the spring and wheel and pull up to remove them.

مرحله 12

  • تسمه کارتریج را از قلاب سمت دیگر پرینتر با استفاده از موچین به سمت چپ و بالا بکشید تا باز شود.

Unwrap the carriage belt from the hook on the other side of the printer using the tweezers by pulling to the left and up.

مرحله 13

  • میله فلزی متصل به کارتریج را بگیرید.
  • میله را به سمت چپ فشار داده و سپس انتهای راست آن را بلند کنید.
  • میله فلزی را مستقیما بلند نموده و کاملا از پرینتر بلند کنید، سپس میله را به چپ و راست فشار داده تا از کارتریج خارج شود.
بخوانید  تعویض هارد دیسک HP DV5T-1000

Grab the metal rod connected to the carriage.Push the rod to the left and lift up the right end.

مرحله 14

  • کارتریج را وارونه کنید.
  • با استفاده از موچین فلزی، گیره روی تسمه کارتریج را ابتدا با کشیدن آن به سمت پشت و سپس به جلو، بردارید.
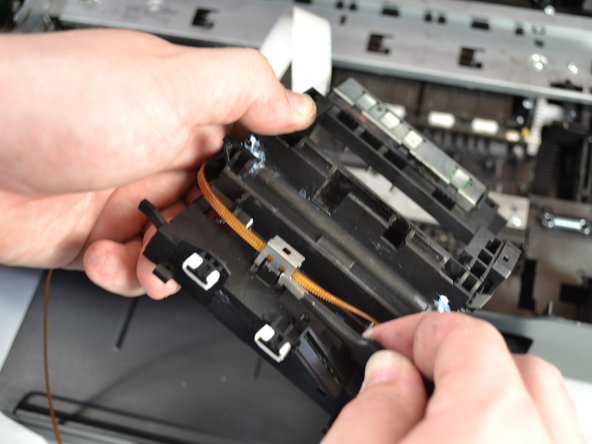
Flip the carriage upside down.Using the metal tweezers, remove the clamp over the carriage belt by first pulling up on the back of the clamp, then on the front.

مرحله 15

  • کارتریج را با یک دست نگهداشته و با دست دیگر تسمه کارتریج را به بالا بکشید تا تسمه کارتریج برداشته شود.
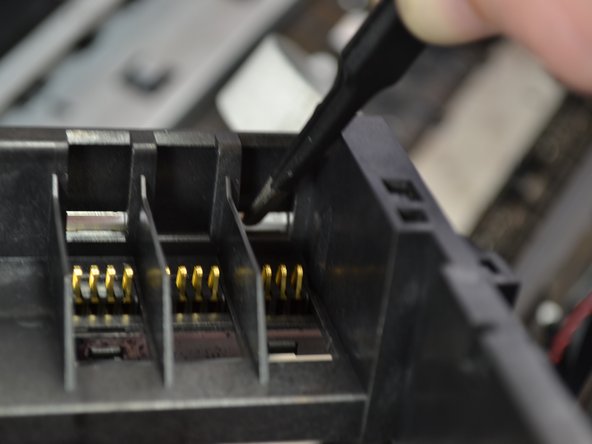
Remove the carriage belt by holding the carriage in one hand and pulling the carriage belt up with the other.

مرحله 16- کارتریج

  • سه چفت را همزمان با موچین به پشت کاتریج فشار دهید.

قلاب فلزی پس از باز شدن چفت ها سقوط می کند، مطمئن شوید که آن را با یک دست نگهداشته اید.
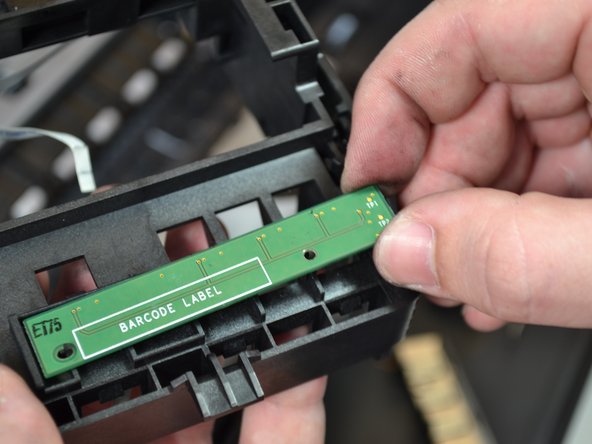
Use the tweezers to push the three latches out of the back of the carriage one at a time.The metal bracket will fall off after unhooking the latches, so make sure to hold it in place with one hand.The metal bracket will fall off after unhooking the latches, so make sure to hold it in place with one hand.

مرحله 17

  • با توجه به لیبل بارکد در سمت راست، سمت راست تراشه را گرفته و از کارتریج بیرون بکشید.

With "Barcode Label" right-side up, grab the right side of the chip and pull it off the carriage.

مرحله 18

  • 4 کانکتور باید به آسانی برداشته شوند. اگر آنها به آسانی برداشته نشوند، موچین را از بالا روی آنها فشار دهید تا خارج شوند.
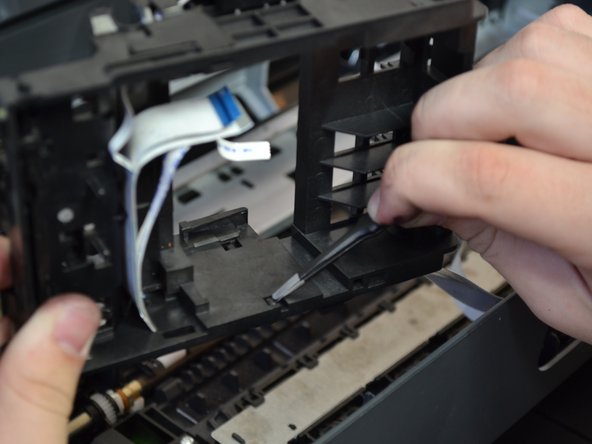
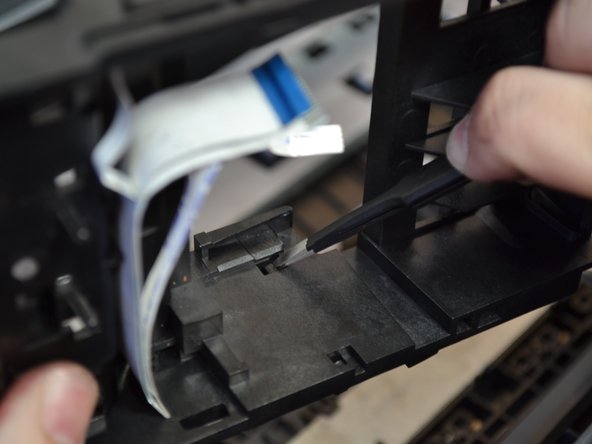
The four (4) connectors should come out easily. If they do not, you can use tweezers to push them out from the top.

مرحله 19

  • کارتریج را از انتهای کابل ها در سمت بالا بچرخانید.
  • با استفاده از موچین، یکسمت قلاب مشکی را از نزدیکترین قسمت به خود روبه پایین فشار دهید و سپس بردارید.
  • این روند را در سمت دیگر تکرار نموده تا قلاب کاملا برداشته شود.

Turn the carriage on its side with the ends of the cables on the top side.Using the tweezers, remove one side of the black bracket by pushing the side closest to you downwards.

مرحله 20

  • کابل های نواری را با یک دست نگهداشته و از دست دیگر برای کشیدن قلاب پلاستیکی استفاده نمایید.

این کار ممکن است برای بیرون کشیدن کابل ها در یک زمان مفید باشد.
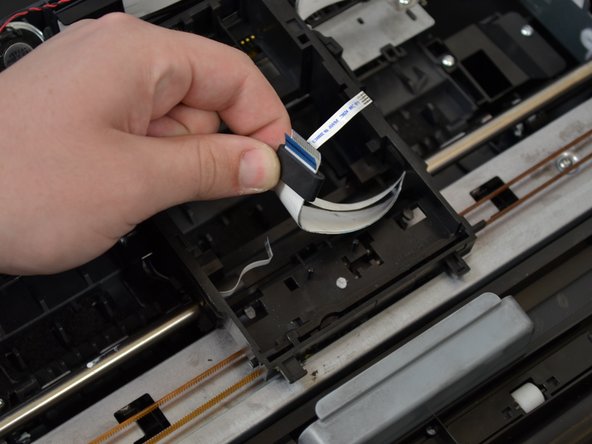
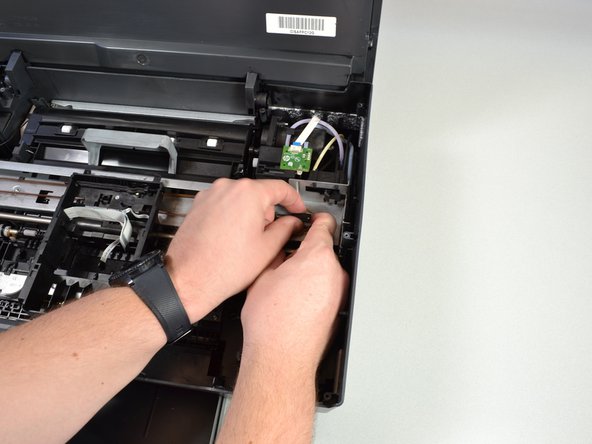
بخوانید  تعویض نوار رمزگذار Officejet Pro 6835 اچ پی

Hold the ribbon cables with one hand and use the other hand to pull off the plastic bracket.It may be helpful to take the cables out one at a time if you can't fit them all through at once.It may be helpful to take the cables out one at a time if you can't fit them all through at once.

مرحله 21

  • کابل ها را با گرفتن حامل با یک دست و کشیدن تمامی کابل ها با دست دیگر در جهت مخالف، بیرون بکشید.
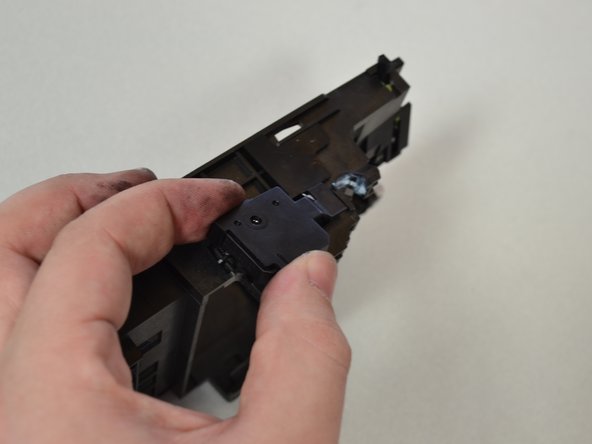
Pull the cables out of the carrier by gripping the carrier with one hand and pulling all of the cables together with your other hand in the opposite direction.Pull the cables out of the carrier by gripping the carrier with one hand and pulling all of the cables together with your other hand in the opposite direction.

مرحله 22

  • حامل را به یک سمت بچرخانید.
  • پیچ (6 میلیمتری T6) در سمت حامل را با چرخاندن پیچ گوشتی در خلاف عقربه های ساعت، بردارید.
  • کاور پلاستیکی را از حامل بکشید تا بلند شود.
  • چفت مشکی را با کشیدن کابل نواری از حامل به سمت بالا، بردارید.

Flip the carrier on the side.Remove the screw (T6 6mm) on the side of the carrier by turning the screwdriver counterclockwise.Lift off the plastic cover by pulling it up off the carrier.

از دیگر مقالات مربوط به پرینتر HP: تعویض مادربرد P1102w لیزر جت اچ پی

پاسخ دهید

نشانی ایمیل شما منتشر نخواهد شد. بخش‌های موردنیاز علامت‌گذاری شده‌اند *