اردیبهشت 7, 1403 11:18 ق.ظ

ایران سرویس

خیابان بهبودی، نرسیده به نصرت، جنب بانک سپه، پلاک 145،ساختمان بنیامین،طبقه 5 واحد 18
دفتر مرکزی: 66097851  مرکز تعمیرات: 66097859  شعبه شرق: 77978135  شعبه هفت تیر: 88836102  شعبه جنوب: 55300568   شعبه غرب: 44153186   شعبه شمال 26721443   شعبه اسلامشهر و رباط کریم: 56746602

 تعویض مادربرد تلویزیون شارپ مدل Aquos LC13B2UA
تعویض مادربرد تلویزیون شارپ مدل Aquos LC13B2UA

مرحله 1- پایه تلویزیون

  • تلویریون را از صفحه خود بر روی سطح صاف قرار داده تا صفحه آن خراشیده نشود.
  • 4 پیچ 8 میلیمتری متصل کننده پایه به تلویزیون را بردارید.

Place the TV face down on a flat smooth surface as to not scratch the screen.Remove the four 8mm screws attaching the stand to the TV.

مرحله 2

  • پایه را از تلویزیون بلند کنید.
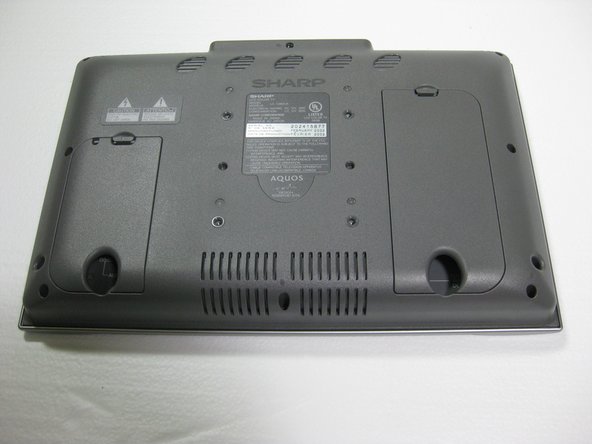
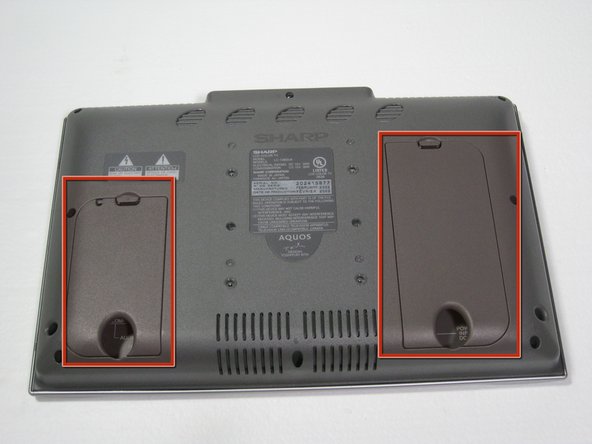
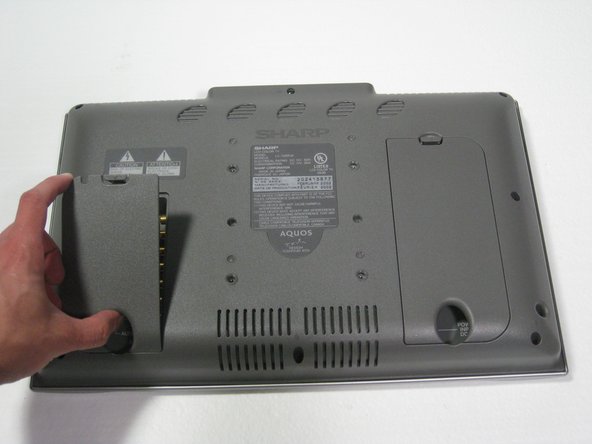
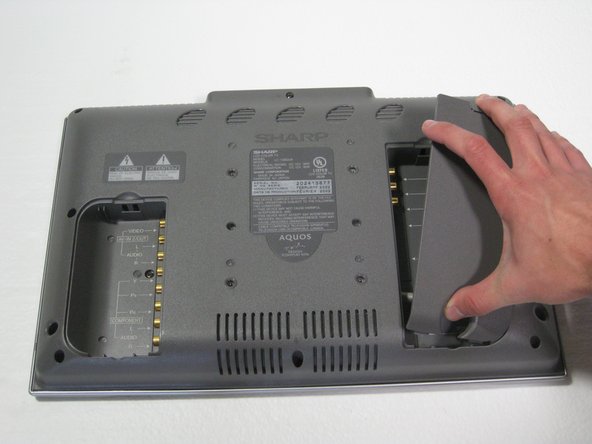
Lift the stand off the television.Lift the stand off the television.

مرحله 3- کیس پشت

  • دو پنل پشت را بردارید.
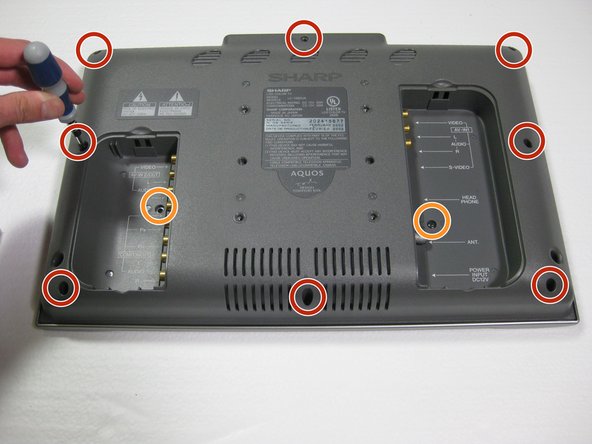
Remove the two back panels.Remove the two back panels.Remove the two back panels.

مرحله 4

  • 8 پیچ 6 میلیمتری فیلیپس در اطراف لبه را بردارید.
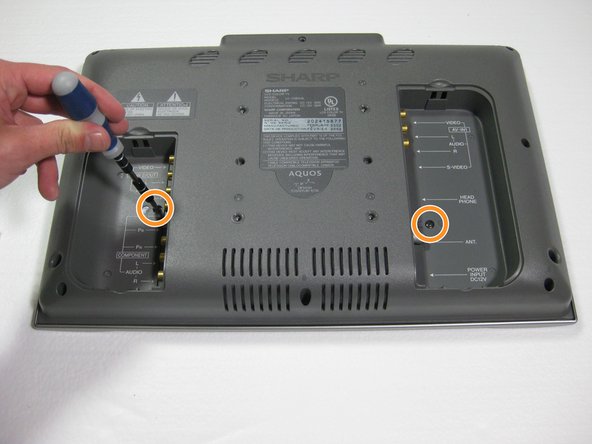
  • 2 پیچ 6 میلیمتری فیلیپس واقع در نزدیک ورودی ها را بردارید.

Remove the eight 6mm Phillips screws around the edge.Remove the two 6mm Phillips screws near the inputs.

مرحله 5

  • کیس کاور تلویزیون را بلند کرده و سپس آن را بردارید.

Lift and remove the back case of the television.

مرحله 6- مادربرد

  • دو کابل اسپیکر و کانکتور را از برد مدار با بلند کردن کانکتورهای پلاستیکی و بیرون کشیدن آنها، بردارید.

قسمت پلاستیکی کانکتور را بکشید، هرچند ممکن است آسانتر از کشیدن سیم ها باشد.
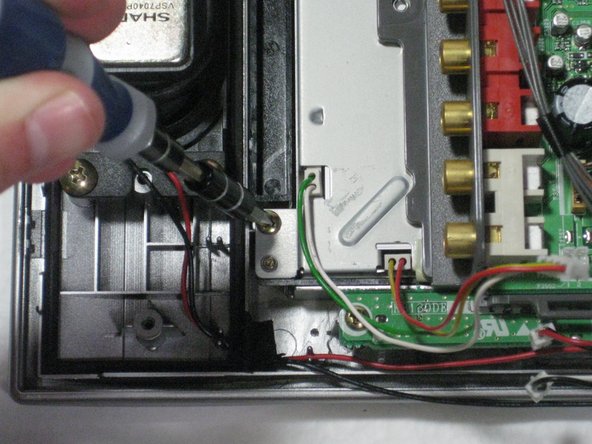
Remove the two speaker cables and the connector from the circuit board by pinching the plastic connectors and firmly pulling up.Pull on the plastic part of the connector, even though it may seem easiest to pull on the wires.Pull on the plastic part of the connector, even though it may seem easiest to pull on the wires.

مرحله 7

  • کانکتور سبز و خاکستری برق را از پنل دکمه ها در بالای تلویزیون بردارید.
  • کانکتور خاکستری/ سبز تا خاکستری/ نارنجی را از مرکز برد مدار بردارید.

Remove the green and gray power connector from the side of the buttons panel at the top of the television.Remove the green/gray to orange/gray connector from the center of the circuit board.

مرحله 8

  • 4 پیچ 5 میلیمتری فیلیپس متصل کننده LCD و برد مدار به کیس جلو را بردارید.

Remove the four 5mm phillips screws attaching the LCD and circuit board to the front case.Remove the four 5mm phillips screws attaching the LCD and circuit board to the front case.

مرحله 9

  • بلوک LCD/ برد مدار را با بلند کردن سمت نزدیک برد مدار و حرکت آن زیر فریم دکمه، از کیس بلند کنید.

Lift the circuit board/LCD block from the case by lifting the near side of the circuit board and sliding it under the button frame.

نمایندگی شارپ

مرتبط: تعویض راکر صدا سری مینی SHV31 شارپ

بخوانید  تعویض فیوزهای Aquos LC13B2UA شارپ

پاسخ دهید

نشانی ایمیل شما منتشر نخواهد شد. بخش‌های موردنیاز علامت‌گذاری شده‌اند *