اردیبهشت 11, 1403 12:48 ب.ظ

ایران سرویس

خیابان بهبودی، نرسیده به نصرت، جنب بانک سپه، پلاک 145،ساختمان بنیامین،طبقه 5 واحد 18
دفتر مرکزی: 66097851  مرکز تعمیرات: 66097859  شعبه شرق: 77978135  شعبه هفت تیر: 88836102  شعبه جنوب: 55300568   شعبه غرب: 44153186   شعبه شمال 26721443   شعبه اسلامشهر و رباط کریم: 56746602

 پیاده سازی سطح مایکروسافت Pro X
پیاده سازی سطح مایکروسافت Pro X

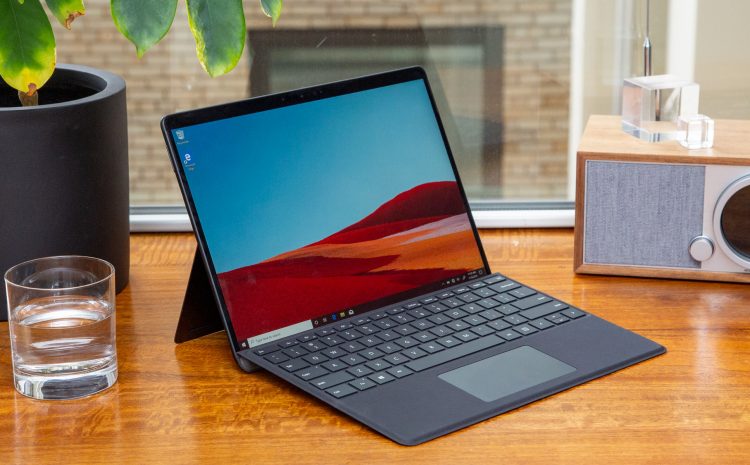
مرحله 1 پیاده سازی سطح مایکروسافت

  • نمایشگر 13 اینچی با رزولوشن 2880 * 1920 (267 پیکسل)
  • پردازنده ARM0 گیگاهرتزی SQ1 مایکروسافت با GPU 685 آدرنو SQ1 مایکروسافت
  • 8 گیگا بایت رم LPDDR4X (16 گیگا بایت اختیاری)
  • درایو حالت جامد 128 گیگا بایتی قابل جابجایی (256 گیگا بایت یا 512 گیگا بایت اختیاری)
  • دوربین جلوی 5 مگاپیکسلی و دوربین عقب 10 مگاپیکسلی
  • دو پورت USB-C و یک پورت اتصال سطحی (جک های هدفون بطور ظاهری حرفه ای نیستند)
  • وای فای 5 11ac، بلوتوث 5.0، گیگابایت LTE

Apart from that sweet kickstand, we're not sure what to expect here—and that's a good thing. Our teardown unit boasts the following specs:13" PixelSense display with 2880 × 1920 resolution (267 ppi)

مرحله 2

  • برخلاف Pro 7 که ماه گذشته روی کار آمد، Pro X دارای طراحی کاملی است و با شماره مدل جدید 1876 معرفی می شود.
  • در زمان پیاده سازی، بررسی اشعه X از الکترون خلاق انجام می شود که هر چیزی را در برنامه ما نشان می دهد.
  • در مقایسه با Pro 7، این دستگاه دارای گوشه های مدور Pro X، شکل باریک تر، و انتخاب پورت کوچکتر است.
  • این تبلت از نظر یک تبلت حرفه ای نازک از پورت USB-A، شیار کارت SD میکرو و جک هدفون خداحافظی کرده است. USB-C در آینده معرفی می شود.

Unlike the fairly-iterative Surface Pro 7 released last month, the Pro X is a complete redesign—the first in many years. And it comes with a new model number: 1876.What a great year, 1876. Feels like just yesterday we were tearing down Alexander Graham Bell's new "telephone."If you need a teardown TL;DR, here's an X-ray overview from Creative Electron showing everything on our agenda.

مرحله 3

  • Pro X یک لولای صافی دارد که احتمالا از ضخامت دقیقی برخودار است.
  • در مقایسه سریع با درایو 256 گیگابایتی، لپ تاپ سطح 3 هر دو دستگاه را با یک درایو تایید می کند.
  • برخلاف لپ تاپ 3 با پیچ های مخفی، در این دستگاه هیچ بستی پیدا نمی شود.
بخوانید  پیاده سازی لپ تاپ سطح 3 مایکروسافت (15 اینچی)

With the kickstands raised, we can see that the Pro X gets a sleeker hinge—likely shaving off precious thickness.And if you look closely, you'll find the faint outline of what can only be described as a secret trap door in the Pro X. Lucky for us, it's not guarded by a three-headed dog.We poke the (magnetically secured!) trap door with our SIM eject bit, and...

مرحله 4

  • ابتدا مکش کمی برای بلند کردن نمایشگر نزدیک گریل اسپیکر وارد کنید.
  • شاید iOpeners بتواند آن را بلند کند.
  • چسب فومی باعث بهبود دستگاه Pro سطحی می شود.

But first—a little suction (maybe more than a little) to try and lift the display near the speaker grille.Look ma, no heat! Perhaps our iOpeners can take the day off—we're able to cut right in, iMac-style.No goopy tendrils hold this display down—it comes off clean!

مرحله 5

  • از تراشه های نمایشگر می توان مجددا استفاده کرد:
  • نمایشگر X904169 و X904163 مایکروسافت
  • Winbond Q16FWUXB2 1921-681C DR80006
  • Analogix ANX2684 1920 C975AA
  • SiW SW50014A 8266631T 1844
  • SiW SW5077 J004370V 1920

While relatively painless, this opening procedure is not without hurdles—we see a few flex cables along the bottom of the display, dangerously close to the path of our cutting tools.That said, it gets even painless-er when we start removing the adhesive. It peels off like magic—no mess! This is the kind of change we've been pleading for. If you must glue together a super thin, space-constrained device, this is how you should do it. (But don't do it on a desktop, okay? Because that's just lame.)

مرحله 6

  • در جعبه ابزار Pro Tech، فقط به ابزار تروکس برای باز کردن پیچ های سینک حرارتی نیاز است.
  • تمام پیچ ها از نوع تروکس هستند.
  • از لبه فریم میانی سینک حرارتی باید محافظت شود.
  • پیج های سینک حرارتی و روکش ها برای جدا شدن مادربرد باید برداشته شوند.

We came armed with our entire Pro Tech Toolkit, but only need a single Torx bit to twirl away the heat sink screws.Here's one thing we're glad Microsoft didn't change: All the screws so far are just Torx. That was the previous Surface Pro's sole positive repairability point, and it's good to see it return.Supporting the heat sink is an interesting bit of abstract art intermediate frame-age. We briefly pause to contemplate its meaning before pulling it away from the board.

مرحله 7

  • پردازنده ARM0 گیگا بایتی SQ1 مایکروسافت
  • رم LPDDR4X 4 گیگا بایتی K3UH5H0AMJGCL سامسونگ
  • میکروکنترل کننده NXP LPC54S00TJ EV180
  • فلش مموری NOR سریالی Macronix MX25U1635E
  • فلش مموری 256 مگابایتی Winbond 26Q256JW
  • مودم و گیرنده RF Qualcomm SDR8150
  • Qorvo 78052 14CEM RF Fusion MHB

Here's what we dug up:

مرحله 8

  • قسمت پشت برد فاقد سیلیکون است، اما نمی توان به سیم نقره ای چسبیده به آن دقت نکرد.
  • آنتن روکش دار برای عایق RF به و از سرب سیگنال داخلی وجود دارد. استیکر SAM جدید می تواند سیم را با عنوان پایه آنتن سطحی مشخص کند.
  • SAM جدید می تواند هر چیزی باشد.
بخوانید  تعمیر گوشی مایکروسافت | تعمیر موبایل مایکروسافت

The back side of board is devoid of interesting silicon, but we can't help but notice the strange silver jumper wire clinging to it. Hey wait a minute, this thing actually looks kinda familiar.What's it for? You're welcome to inspect where it's routed and try to guess!We think it may be a shielded diversity antenna of some kind, with a grounded exterior to insulate RF to and from the interior signal lead. The accompanying sticker NEW SAM could be labelling the wire as a Surface Antenna Mount.

مرحله 9

  • کاور SSD در یک طرف اره کوچک قرار دارد و منتظر است تا ابزار خروج SIM یا کارت ویزیت سیم کارت آزاد شود و در آن طرف بنشیند. وقتی چنین اتفاقی بیفتد، اره کاور SSD را هل می دهد تا از کیس دور شود. در اینصورت می توان فضای ذخیره سازی خود را ارتقا داد.

We're used to seeing some fancy mechanics driving the kickstand hinge in these Surface Pros, but this time we're treated to even more fancy mechanics.The SSD cover sits on one side of a tiny see-saw, waiting for a friendly SIM eject tool or paperclip to come along and sit on the other side. When that happens, the see-saw pushes the SSD cover away from the case, and bam! Just like that you can upgrade your storage.When we're done at the world's smallest playground, we move over to the SSD interface and SIM reader, which come out as one module.

مرحله 10

  • مشخصات باتری را باید به یاد داشت.
  • باتری 38.2 وات ساعت کوچکتر از باتری 45 وات ساعت دستگاه Pro 6 و اندکی بزرگتر از باتری 36.5 وات ساعت iPad Pro9 اینچی است.

Step right up and get yer battery specs! We spent long enough wrestling with the last uberglued Microsoft  battery to know better than to mess with this one. We opt to leave it be.This quad-cell, 38.2 Wh battery is unsurprisingly smaller than the 45 Wh battery in the Surface Pro 6, and just slightly bigger than the 12.9" iPad Pro's 36.5 Wh twin-cell.What's left? Modular USB ports, flanked by the kickstand hinge mechanism and the case buttons. And at the far end lies the Surface Connect port—also modular.

مرحله 11

SSD یک قطعه قابل تعمیر است و فقط به پین خروج SIM و درایور T3 نیاز ندارد. لزومی به برداشتن صفحه نیست.

در تبلت ها، از چسب فومی برای نگهداشتن نمایشگر استفاده می شود که برای برداشتن این قطعه نیازی به گرم کردن چسب نمی باشد و به راحتی جدا می شود.

Ta-da! That's all for now, folks. Here are all the little bits of this Surface.It would seem that Microsoft has placed at least one foot on the repairability train—between this Pro X and the Laptop 3, we can hardly believe all the repair-focused changes they've made!

دیگر مقالات: تعمیر گوشی مایکروسافت

پاسخ دهید

نشانی ایمیل شما منتشر نخواهد شد. بخش‌های موردنیاز علامت‌گذاری شده‌اند *